Use radio buttons and checkboxes
If you need to collect data from users where they can choose one or multiple options, you can use radio buttons or checkboxes. This allows the signer to select one or several options from the provided list. This can be useful, for example, when gathering information about previous work experience or selecting product categories.
To add radio buttons and checkboxes:
- Open the document builder where you want to add radio buttons or checkboxes.
- Select Radio or Multiple from the right panel and draw the field at the location on the page where it should be.
- Once you draw the field, the field will appear in the upper right corner, and below it, a list with one option will appear.
- Select the first item and enter the name of the option.
- If you need to add more options, click the Add option button and enter the name of the option.
- To the right of the option name, a button with a plus ( +) icon will appear. Click on it and draw this option at the required location. Or simply click on the page to add a checkbox with the same size as the previous one.
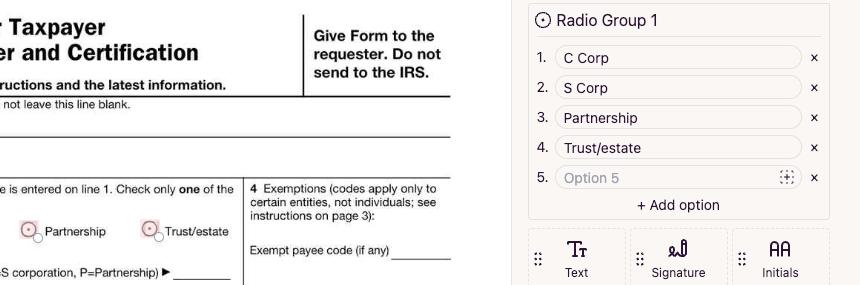
- Repeat this process with as many radio or checkboxes field options as needed.
- Now the user can choose one or several options from those provided.
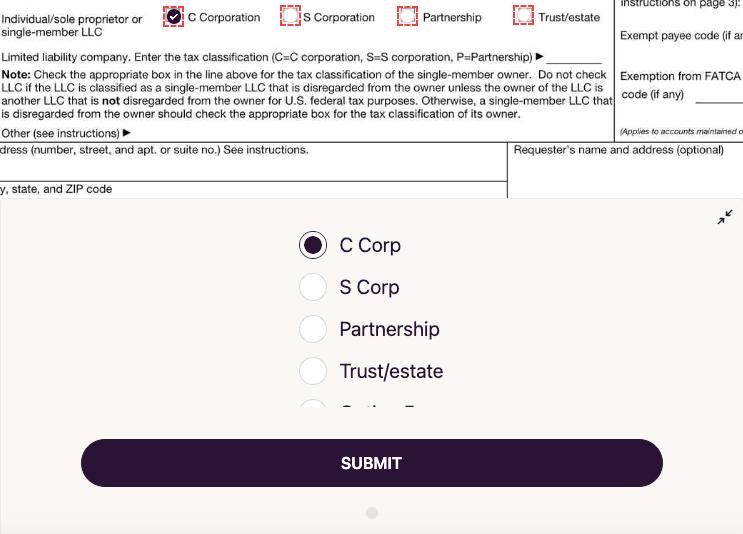
The main difference between a radio button and a checkbox group is that a radio button allows the selection of only one option, whereas a checkbox group allows multiple options to be selected simultaneously.
Related Articles
How to - Create a new Scope item for use in Macros and Pricing
Creating a report with a template in Clean Claims - Mobile
Creating a report with a template in Clean Claims - Mobile Made by Paul Silliman with Scribe Please reach out to support@cleanclaims.com with any questions or issues. 1. Click Project Actions 2. Tap Report 3. Tap the template icon 4. Select the ...New Clean Claims Photo Selector Overview 📸
<br> Procedure for Selecting Photos in Reports 1. Access the Reports Section Log in to the Clean Claims platform. Navigate to the 'Reports' section. 2. Select Report Images Locate the top toggle labeled 'Select Report Images'. Click on ...How to - Add a New Cost Sheet
Create a New Cost Sheet for Scope Items 1. Navigate to https://app.cleanclaims.com/ 2. Click "Admin" 3. Click "Project Configurations" 4. Click "Scope" 5. Click "Create cost sheet" 6. Name the Cost Sheet 7. You can copy existing prices from any other ...Create a Custom Report Template in Clean Claims
1. Navigate to https://app.cleanclaims.com/ 2. Click Admin 3. Click Project Configuration 4. Click Report Template Tip! You can modify existing templates or create new templates from this screen 5. Click Create Template 6. Select which field you want ...